


Creating Angular Synchronous and Asynchronous Validators for Template Validation

This isn't a new topic, but I've had a hard time to find consolidated information on Validators for the scenario I describe here so I decided to write this down. Although not complicated, it took me way too much time to hunt down all the information to make Async validators work, and I hope this post makes that process a little easier. I'm writing this, while using the current version which is Angular 8.
Angular provides a bunch of built-in validators out of the box for the common client side validations. So things like required, min-width and max-width and a generic RegEx pattern validator just work without creating any custom validators.
But if you're building any type of reasonably complex application you're likely to require custom validations that require firing of custom business logic and at that point you'll have to dig in and create custom validators. If that business logic happens to live in data that's only on the server you will need to call an async validator which is just a little different.
The process for creating custom validators is:
- Create a class derived from Validator or AsyncValidator
- Implement the
validate()method - Return
nullfor valid, or anValidationErrorsobject for invalid - Async Validators return an
Observable<ValidationErrors>instead - Add the class to Module Declarations
- Add the class to the component Provider list
To use it then:
- Create declarative Validator(s) on HTML Template controls
- Add error blocks for validation errors
Synchronous and asynchronous Validators are very similar - the main difference is that a sync Validator returns an error object instance directly, while the async version returns an Observable of the the same object. The most common use case for async Validators is doing a server validation via an HTTP Callback. I'll look at creating the sync version first, then modify for simulated async, and then finish off with an example AsyncValidator that makes an HTTP call to a server to validate some server side business logic.
Note, I prefer to use declarative validation with validators applied in the HTML template, so that's what I'll talk about here. But all of this also works with Reactive Forms where you can just provide the validator directly to the FormControl creation process.
Sync Validatators First
Let's create a very simple validator - a YesNoValidator. The validator takes an optional input value which is an attribute assignment of yes or no:
<input name="Name" yesNoValidator="no" />
If the key item in the above is the yesNoValidator="yes" on the <input> element no error is shown as the validation is valid. yesNoValidator="no" should display an error message. Note that validators don't require a value so you could have a validator like:
<input name="Name" yesNoValidator />
and that would still work. But if you do need to pass a value to the to the validator you can access it via the passed in control.value property. It's more typical to not have explicit values as in the latter example.
Validator Naming Conventions
The docs show validator selector names without a
Validatorpostfix as I do here. I find that problematic because in a lot of cases it's not very obvious that the attribute is a validator.yesNoas an attribute is pretty ambiguous and to me at leastyesNoValidatoris not, so I'm leaving theValidatoron in my selectors unless the name is obviously for validation.
Create the Validator Class
Lets start with the sync implementation by deriving a class from Validator and implementing the validate() method:
import {
    AbstractControl,
    NG_VALIDATORS,
    ValidationErrors, Validator
} from '@angular/forms';
import {Directive} from '@angular/core';

@Directive({
    selector: '[yesNoValidator]',
    providers: [
        {provide: NG_VALIDATORS, useExisting: YesNoValidator, multi: true}
    ]
})
export class YesNoValidator implements Validator {

    constructor() {
    }

    validate(control: AbstractControl): ValidationErrors | null {
        const val = control.value;
        if (!val || val.toLowerCase() === 'yes') {
            return null;   // valid
        }

        // invalid - validation errors display
        return {yesNoValidator: 'You chose no, no, no!'};
    }
}
The validate() method
Validators work primarily through what's returned from the validate() method. The validate(control:abstractControl): ValidationErrors|null implementation of a Validator works by returning null if the validation is valid (no error), or returning a ValidationErrors object that contains an error key/value. Typically this is an object map with a single value that corresponds to the validator name.
The error value can be something as simple as a true or false value, which is what some of the built-in Validators do.
For example the built-in required validator returns this when validation fails:
{ required: true; }
I find it more useful to return an error message, so in the above yesNoValidator I return:
{ yesNoValidator: "You said, no, no, no." }
You can also return something more complex like an object:
{
    yesNoValidator: {
        isValid: false,
        message: "You said, no, no, no."
    }
}
It's up to you what to return, and what is then exposed to your error display logic in the template. By convention you should be able to rely on a truthy value to determine if the validator is valid or invalid. Beyond that you have to know what it returns. This is the reason most of the built-in ones return simple true or false values and rely on templates to render error messages.
If the control validation fails, the result validationErrors object is available to the form as form1.controls['controlName']?.errors?.yesNoValidator (or if you implement an object .yesNoValidator.message) property and you can then decide how to work with the values. I recommend keeping the results simple and personally I prefer to return error strings.
Selector in the Class Directive
To specify how you can access this validator you provide a Selector in the Class Directive header. The selector is the attribute name you'll use for the validator in an HTML element tag and here I use yesNoValidator.
selector: '[yesNoValidator]',
Note that the syntax is a bit funky which requires that the selector(s) is specified inside of square brackets and without quotes around the name(s). You can specify multiple names separated by commas.
Register the Validator as a Validator and Provider
Validators have to be registered so Angular is aware of them and can use them during binding. Make sure you provide the Validator to Angular's validator provider list in the class header using NG_VALIDATIONS in the provider list:
providers: [
    {provide: NG_VALIDATORS, useExisting: YesNoValidator, multi: true}
]
If you're building an async Validator use NG_ASYNC_VALIDATIONS. This is an easy thing to miss if you're converting a Sync Validator from sync to Async so heads up! (ask me how I know 😃)
Register the Validator Declaration in the Module
Finally, register the Validator with a module (or root module) where it's to be used:
@NgModule({
  declarations: [
      ...
      YesNoValidator
  ],
Use it in the Template
Then to actually use it in an HTML Template:
<mat-form-field>

    <input matInput name="units"
           [(ngModel)]="activeEffect.measurement.units"
           yesNoValidator="yes" required>

    <mat-error *ngIf="form1.controls['units']?.errors?.required">
        Units is required.
    </mat-error>
    <mat-error *ngIf="form1.controls['units']?.errors?.yesNoValidator">
        {{ form1.controls['units']?.errors?.yesNoValidator }}
    </mat-error>

</mat-form-field>
If I run this now and use no as the value I get:
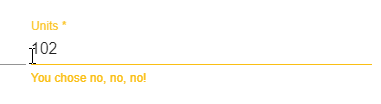
If I run it with yes no error shows.
Displaying Errors on a Declarative Form
Errors can be displayed based on the error status of a control. You can reference a Form Control and its .errors property to determine whether the are any errors. By convention it's something like:
form1.controls['name']?.errors?.yesNoValidator
and you can bind that or use it as an expression.
Note the ? for null handling, which you'll want to add since you otherwise end up with potential binding errors due to the missing errors object when there are no errors yet.
To put this into form error handling you can now use this with the simple string value:
<mat-error *ngIf="form1.controls['units']?.errors?.required">
    Units is required.
</mat-error>
<mat-error *ngIf="form1.controls['units']?.errors?.yesNoValidator">
    <!-- I use an error string for the validator result value -->
    {{ form1.controls['units']?.errors?.yesNoValidator }}
</mat-error>
And that works just fine! Make sure to use the nullable values (?s) to ensure there are no binding errors before there are errors or before the form has rendered.
If static values work for the messages, by all means use a static string in the UI. If the error message is dynamic and generated as part of the validator, it's nice to embed the customized message like yesNoValidator example.
Note that I'm using Angular Material which automatically detects validator errors and automatically fixes up the UI and styling. It actually displays errors without any conditional *ngIf expressions.
With plain HTML you have to use something <div *ngIf='...' to trigger rendering of errors explicitly. For Angular Material, the *ngIf expressions are necessary only if you have multiple validators and you want to selectively display one or the other.
Async Validators
The good news is that if you need an Async validator, the process is pretty much the same. The main difference is that you will be returning an Observable<ValidationErrors> rather than a the object directly and setting a couple of configuration strings differently.
Updated Async Validator
Since we've already seen the majority of the code that is required for a validator and that is also used from an AsyncValidator here's the AsyncValidator implementation:
import {
    AbstractControl, AsyncValidator,
    NG_ASYNC_VALIDATORS,
    ValidationErrors, Validator
} from '@angular/forms';
import {Directive} from '@angular/core';
import {Observable, of} from 'rxjs';


@Directive({
    selector: '[yesNoValidator][ngModel],[yesNoValidator][FormControl]',
    providers: [
        {provide: NG_ASYNC_VALIDATORS, useExisting: YesNoValidator, multi: true}
    ]
})
export class YesNoValidator implements AsyncValidator {

    constructor() {}

    validate(control: AbstractControl): Observable<ValidationErrors | null> {
        // turn into an observable
        return of( this._validateInternal(control));
    }

    _validateInternal(control: AbstractControl):ValidationErrors | null {
        const val = control.value;

        console.log('yesno async validator: ',val);
        if (!val || val.toLowerCase() === 'yes') {
            return null;
        }

        return {yesNoValidator: 'You chose no, no, no!'};
    }
}
I moved the old validation function into an private function to call, and then simply used the of rxJs operator to turn that result ValidationErrors value into an Observable. This is super contrived since there's nothing async happening here, but it demonstrates the async setup in the most minimal fashion possible.
Key Changes
The key code changes are:
- Derive from
AsyncValidatorrather thanValidator:export class YesNoValidator implements AsyncValidator - Return an Observable instead of a concrete value:
validate(control: AbstractControl): Observable<ValidationErrors|null> { // turn into an observable return of( this._validateInternal(control)); } - Make sure to add to
NG_ASYNC_VALIDATORSproviders instead ofNG_VALIDATORS:providers: [ {provide: NG_ASYNC_VALIDATORS, useExisting: YesNoValidator, multi: true} ]
There are no implementation changes in the HTML template - the same exact syntax is used. The same .errors object is returned along with the validated values.
A more practical Async Validation Example
The more common scenario for async Validations is to run some server side validation with an HTTP call that returns an Observable<T> result.
Here's an example of an application level Validator that calls back to a server to determine whether an entered name already exists:
@Directive({
    selector: '[instrumentationNameValidator][ngModel],[instrumentationNameValidator][FormControl]',
    providers: [
        {provide: NG_ASYNC_VALIDATORS, useExisting: InstrumentationNameValidator, multi: true}
    ]
})
export class InstrumentationNameValidator implements AsyncValidator {

    constructor(private http: HttpClient,
                private config: AppConfiguration,
                private user: UserInfoService) {
    }

    validate(control: AbstractControl): Observable<ValidationErrors | null> {
        const url = this.config.urls.url('instrumentation-name-exist',
                                         control.value,
                                         this.user.userPk);
        const obs = this.http.get<boolean>(url)
            .pipe(
                map((isUsed) => {
                    // null no error, object for error
                    return !isUsed ? null : {
                        instrumentationNameValidator: 'Name exists already.'
                    };
                })
            );
        return obs;
    }
}
To use it:
<mat-form-field class="third-width">
    <input matInput placeholder="Name"
           name="name"
           [(ngModel)]="measurement.name"
           instrumentationNameValidator required>
    <mat-error *ngIf="form1.controls['name']?.errors?.required">
        The name cannot be empty.
    </mat-error>
    <mat-error *ngIf="form1.controls['name']?.errors?.instrumentationNameValidator">
        {{form1.controls['name']?.errors?.instrumentationNameValidator}}
    </mat-error>
</mat-form-field>
Any keystroke in the field triggers the validate method which creates a delayed (debounced) server request to check against an API whether the name entered already exists. The service returns true or false and map() turns that into null for false (no errors) or a ValidationErrors object if the value is true (has errors). Same as in the sync sample, but wrapped into the Observable.
When not valid, it triggers the second <mat-error> block and that displays the error message generated by the validator:
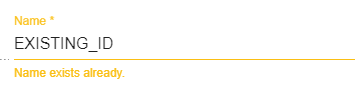
Voila - an async Validator at work.
Summary
There you have it. Validators are not complex to create, but it's a bit tedious to declare and hook them up so that Angular can find and use them. There are a few magic string combinations that can easily screw you up. Ask me how I know 😃 - operator error opportunities abound here. I've written down the things that helped me and that put all the pieces in context, so I hope that this is useful for some of you as well.
Resources
 this post created and published with the
Markdown Monster Editor
this post created and published with the
Markdown Monster Editor
The Voices of Reason
# re: Creating Angular Synchronous and Asynchronous Validators for Template Validation
Thank you for this post!
It really helped me building a directive that checks for duplicates emails. Couldn't find how to go about on async validators. Your post made it so clear to do so.
Again thank you, and keep creating awesome content 😉
# re: Creating Angular Synchronous and Asynchronous Validators for Template Validation
Realise it was a while ago but to answer Raphael's question I would suggest using something like "updateOn: 'blur'" so it sends one request when the user leaves the field.
# re: Creating Angular Synchronous and Asynchronous Validators for Template Validation
Hey there, that's an awesome post there. I was wondering however. How would you do a really debounced async validator. Your current example sends a request with every keystroke. How can I debounce that in a way that it would send the first request to the server after a given timeout/debounce time and not produce 7 server calls for a 7 character word to check?