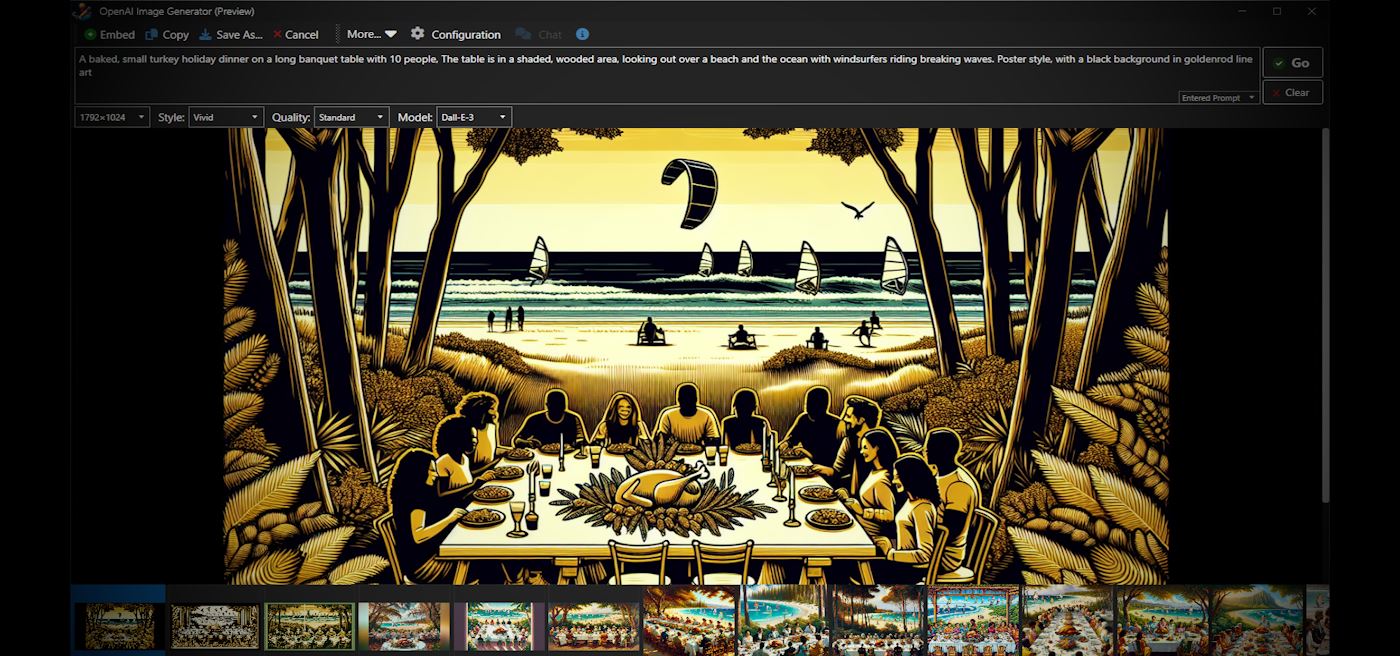
I fell down a rabbit hole after playing around with various image generation AIs and decided that for me this is incredibly useful functionality that I would like to integrate into Markdown Monster - if for nothing else than for my own use. And boy did I ever end up using this tool a lot, not just in the context of MM but also for general image creation.
I'm in constant need of images - for blog posts, for album art, for simple logos for various projects etc. I'm horrible at drawing and creating anything graphics art related has always been a struggle - I suck at it and hiring or auctioning off the artwork for all the little projects I need is just not realistic in most cases both in terms of effort and expense.
And Image AIs can fill that hole quite nicely by providing imaginative ideas and rendering of ideas into images. It may not always be exactly what's needed but can be a great placeholder and sometimes it can even produce spot on results even though they are different from original ideas.
Beyond the utility of Image AIs is also the need to potentially embed that functionality into applications. I publish a Markdown editor tool - Markdown Monster - that can greatly benefit from having image generation built right into it, so users can create images and then immediately embed or paste them into documents.
So I ended up building an integration using the OpenAI and Dall-E 3 image model APIs. The result looks like this:
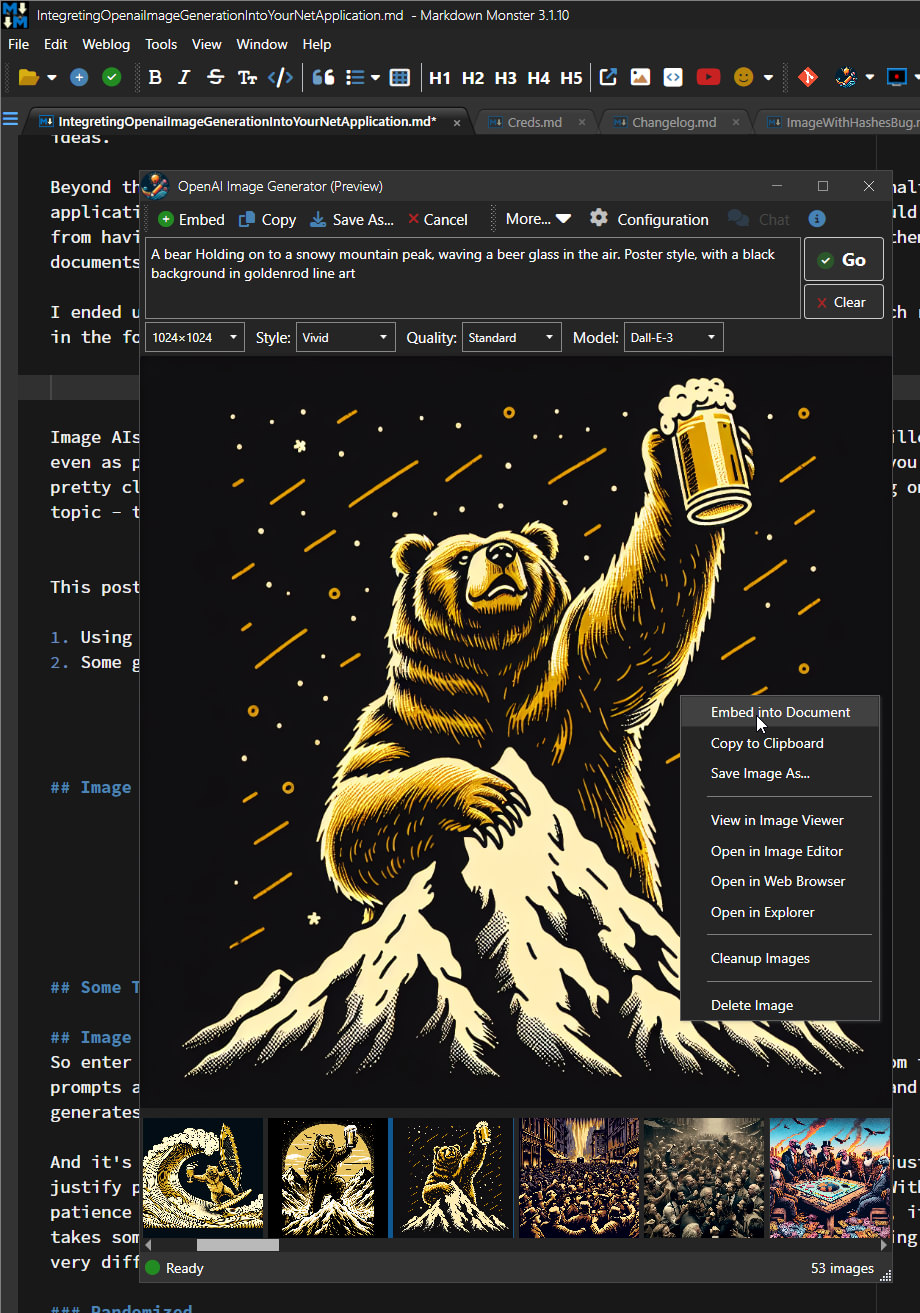
Figure 1 - An AI Image Generator embedded into the Markdown Monster desktop application.
In this post I'll talk about how to do the actual image generation using the OpenAI Dall-E 3 API integration through OpenAI (and also Azure OpenAI once they roll out Dall-E 3 officially). I'll also talk a bit about the integration itself - there are a number of things that need to happen around the edges in order to work with the generated images especially if you build something similar to what's shown above which is basically an image browser.
I'll talk about the OpenAI (and Azure OpenAI) API because it's by far the easiest to work with. There are obviously other Image AI engines (I really like MidJourney) but they cannot be easily integrated into your own applications.
I've broken this article into 2 main parts:
- OpenAI Dall-E 3 API usage and integration
- Some Thoughts on using Image AIs and AI in General
I've chosen this reverse order because the second part falls in the TLDR category, while the first part is the real meat of this article. You can read part 2 at your leisure... or not.
You can find the code samples and library wrapper for this article at:
Westwind Image AI Sample on GitHub
It's a long post so let's get started.

Image Generation using OpenAI and Dall-E 3
I'm going to break down this section into 3 parts:
What you need to get started with OpenAI (and Azure OpenAI)
Before we jump in, let's discuss what you need in order to access the OpenAI API to generate images. The first thing you need will be an account with an API Key. There are two different OpenAI implementations that you can use:
Both use the same API but how you authenticate is different. OpenAI uses a single API Key, while Azure OpenAI uses a Azure hosted AI Deployment URL plus an API Key.
Azure OpenAI and Dall-E 3? Not quite yet!
At the time of writing Azure OpenAI had very limited support for Dall-E 3 via a single Azure region (Sweden Central). Even using that region frequently results in Server Too Busy errors. All regions support Dall-E 2 but don't bother with Dall-E 2 - it's very inferior in quality and basically unusable.
The tests in the GitHub repo show both OpenAI and Azure OpenAI examples, so you can run the samples against either API.
You need an API Key
In this article I discuss using the OpenAI API which is used both by OpenAI and Azure OpenAI. The Azure OpenAI has a different authorization mechanism but otherwise is identical to the OpenAI version (same API protocols). In this article I use only show OpenAI to keep things simple, except for this section where I point out the differences for authorization/initialization.
The difference is how URLs are used and how the API key is applied.
OpenAI
Using the Helper Class discussed below:
var generator = new OpenAiImageGeneration(Configuration.OpenAiApiKey);
For raw API calls OpenAI simply uses a key for a Bearer Authorization token on the request:
Authorization: Bearer sk-epDCUinnBWglcAYbK5OWT1BlbkFJidAXMZ48F9yz9Pay4fKn
Azure OpenAI
Using the helper class:
var generator = new OpenAiImageGeneration(TestConfiguration.Current.AzureOpenAiEndPoint, TestConfiguration.Current.AzureOpenAiApiKey);
Azure uses a custom deployment URL - you basically provide the base URL which consists of your resource set Azure Url plus a deployment name. It looks something like this:
https://myopenaisample.openai.azure.com/openai/deployments/MyImageGenerations
Azure then needs a custom api-key HTTP header on the request.
api-key: 159c85e9fe8d462f92fc101b898534aa
For the rest of this article I'll use OpenAI, but know that Azure AI works the same except for this initial URL and Authorization dance.
Here are the OpenAI sign up and account links you can use:
Individual accounts are billed for usage so you provide an initial amount which can be manually or auto recharged.
Per User or Per Application Keys?
If you plan on using AI of any sort, one thing that you need to decide is who will bear the costs of the AI API requests. If you integrate into your own application do you use a common key for all users, or do you have each user provide their own key?
In the case of a generic tool like Markdown Monster the key needs to be provided by the user, so the app itself requires a configuration UI to provide that key along with some basic directions on where to go and sign up to get one.
If you're building an internal application for your company then you can probably use a shared company API key.
Pricing
For individual Tier 1 pricing, Dall-E 3 Model Pricing is reasonable - at the time of writing pricing for 1024x1024 images is at US 4 cents per image generated, 8 cents for extended formats (16:9/9:16). While that seems pretty cheap keep in mind that the results cost is a bit higher than you might think, because you end up experimenting and the throwing out a lot of generated images. Still it's bargain compared to buying stock art or hiring an artist even for simple things.
Note that pricing is different for Enterprise tiers which you'll likely need if you're providing a shared key for your application when it's widely used. Make sure you understand pricing and limits before jumping into AI usage and the third party dependency that it entails.
Caveat Emptor.
If you choose per user pricing then you'll also need to add some sort of UI that can accommodate the keys, including storing the keys securely.
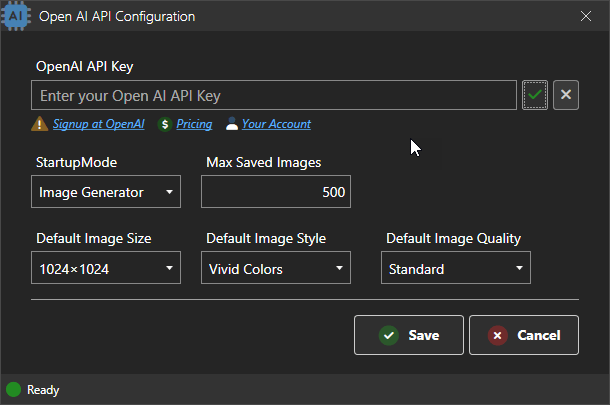
Figure 2 - You'll need to capture the API key if you're using user configurable API keys.
Image Creation 101 - Raw API
Ok, so you're ready to start generating some images. Using the OpenAI Image generation API is very simple and can be easily implemented using simple HTTP REST API calls. IOW, there's no need to use a library, although that can make things a little cleaner, especially if you end up saving images and prompts in a reusable way. More on that later, for now let's just call the API in the simplest way possible: With simple, raw HTTP calls and some dynamic JSON parsing.
To call the API for OpenAI you'll pass:
- An Authorization Header with Bearer token for the API Key
- A simple REST structure for the prompt and output options
At minimum that REST structure has to contain:
- prompt - The text from which to generate the image
- size -
1024x1024 or 1024x1792 or 1792x1042
- model -
dall-e-3 or dall-e-2 (default)
Additional optional parameters:
- n - number of images generated (dall-e-2 only)
- style - vivid or natural
- quality - standard or hd
- response_format - url or b64_json
Here's what that the raw REST request looks like (shown here in West Wind WebSurge):
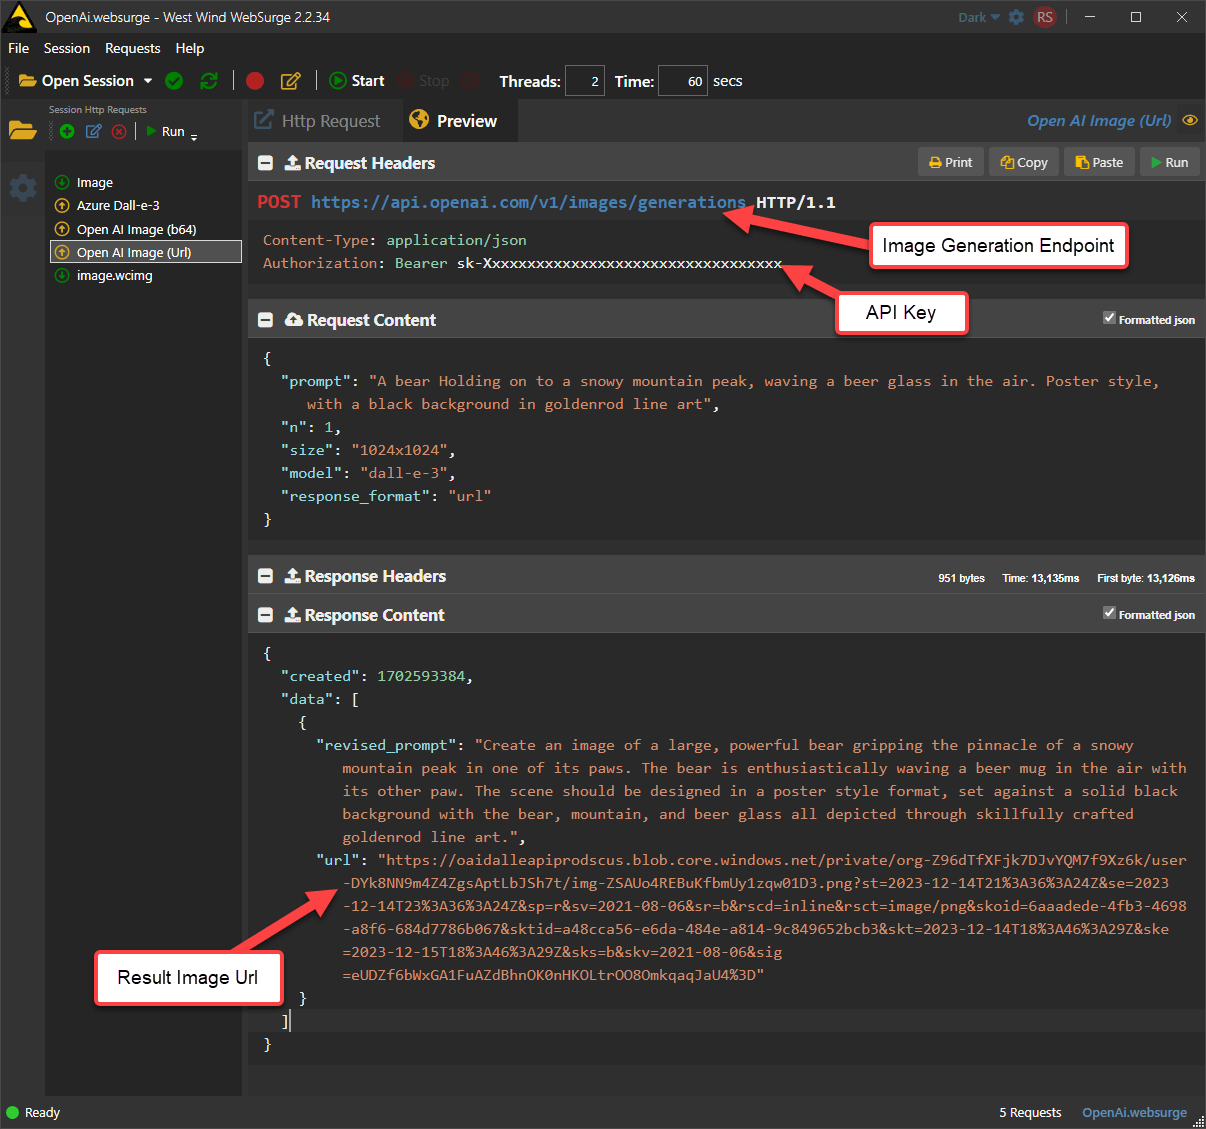 Figure 3 - Raw OpenAI HTTP REST call
In this example the result is returned as a URL which points to an online blob (stored on Azure).
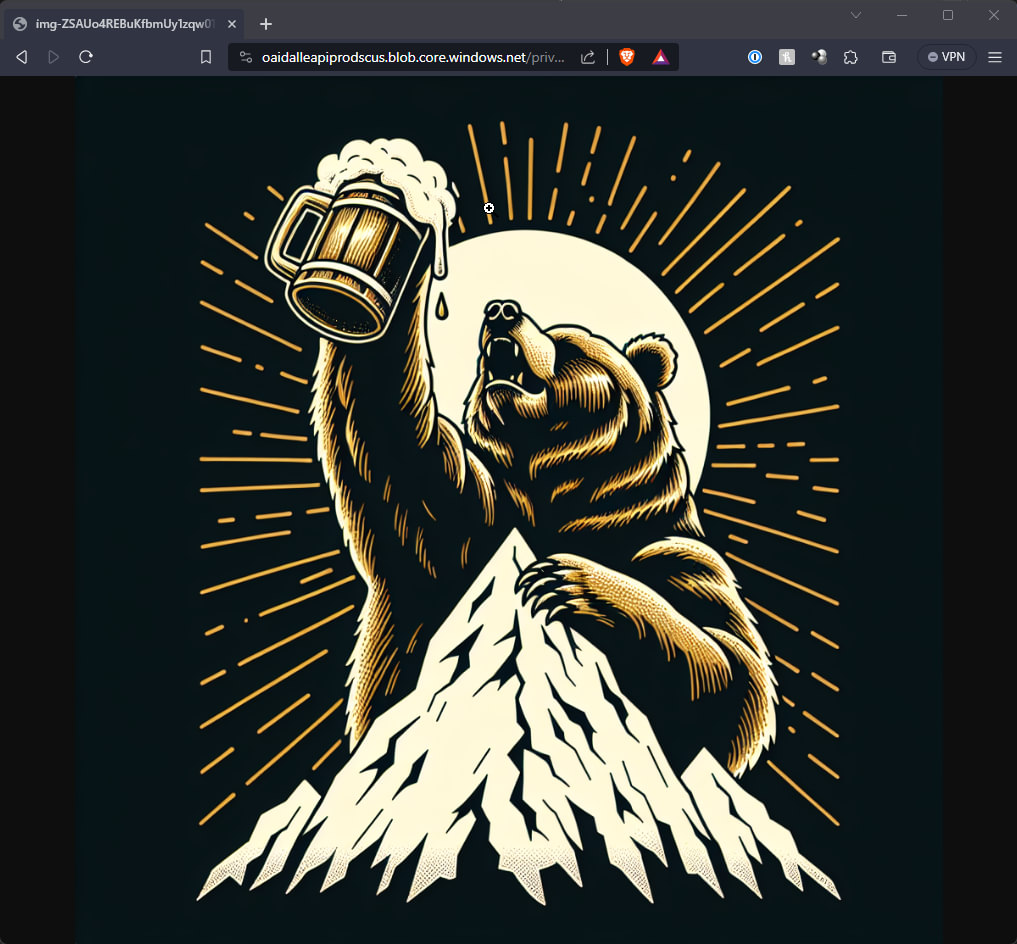
Figure 4 - The image result Url is a short duration blob that you can access in a browser or download
The generated url is not long lived - it's live for a limited time (a few hours it seems) before it expires and becomes invalid. So if you end up with an image you want to keep you have to download the image from the URL or Save As.
Alternately you can also capture the image data as a Base64 string inside of a JSON document which might be easier for an application that wants to store the image to disk or into a database or blob of their own.
Here's what the B64 result looks like:
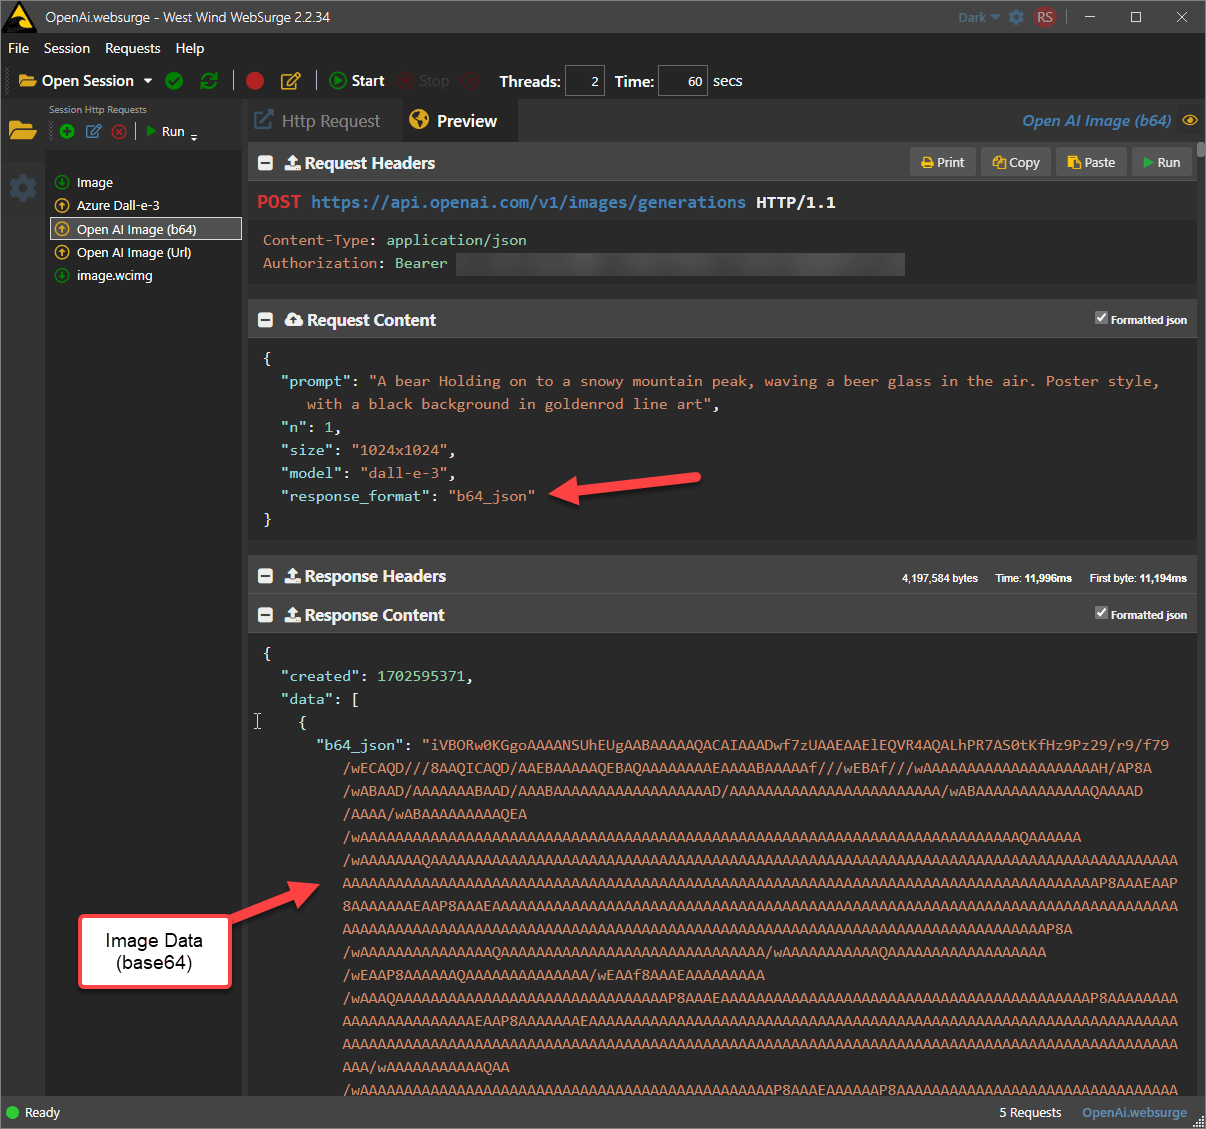 Figure 5 - OpenAI Rest call with Base64 image data result
Personally I prefer the URL - since it can be used immediately for a preview, and if necessary the application can still download a file or raw data from the URL with another HTTP call. In fact that's what I do in Markdown Monster.
Code it up: The simplest thing possible
As you can see the REST calls are very simple to make and it's not much more difficult to create the required .NET code to make the REST calls using HttpClient:
public async Task ImageGenerationTest()
{
    string apiUrl = "https://api.openai.com/v1/images/generations";
    string apiKey = "suuper-seekrity"

    var json = """
{
    "prompt": "A bear hollding on to a snowy mountain peak, waving a beer glass in the air. Poster style, with a black background in goldenrod line art",
    "size": "1024x1024",
    "model": "dall-e-3"
}
""";

    using (var client = new HttpClient())
    {
        client.DefaultRequestHeaders.Clear();
        client.DefaultRequestHeaders.Authorization = new AuthenticationHeaderValue("Bearer", apiKey);

        // make the call!
        var Message = await client.PostAsync(apiUrl, new StringContent(json, new
        MediaTypeHeaderValue("application/json")));

        if (Message.IsSuccessStatusCode)
        {
            var content = await Message.Content.ReadAsStringAsync();

            // Newtonsoft.Json dynamic Json so we can just retrieve the result
            // without mapping to a type (for now)
            dynamic response = JsonConvert.DeserializeObject<JObject>(content);

            var resultUrl = response.data[0].url; // walk the JSON
            Console.WriteLine(resultUrl);
        }
        else
        {
            // error handling - retrieve the error message
            if (Message.StatusCode == System.Net.HttpStatusCode.BadRequest || Message.StatusCode == System.Net.HttpStatusCode.NotFound)
            {
                if (Message.Content.Headers.ContentLength > 0 && Message.Content.Headers.ContentType?.ToString() == "application/json")
                {
                    json = await Message.Content.ReadAsStringAsync();
                    dynamic error = JsonConvert.DeserializeObject<JObject>(json);
                    Console.WriteLine(json);

                    string msg = error.error?.message;
                    Assert.Fail(msg);
                }
            }
        }
    }
}
Full code on GitHub
You create the Http Client, set the auth header and content type, make the call and get back the JSON result. The result returns an object with a list of result image urls (or base64 data if you change the response_format).
If there's an error, the API returns an error result code and JSON that describes the error. It returns an error object with a message property that you can read. Errors typically are over the usage limit, or AI security warnings because you triggered the AI's Safety protocols. Occasionally you can also run into failed prompts due to overload but that's rare.
This Test code has a dependency on Newtonsoft.Json as it parses the Json result dynamically rather than full serialization. We'll look at proper type mapping in the next examples and a small wrapper class.
A small Wrapper and Support Features
If you just want quick and dirty image generation into an application the above code is all that you need.
But if you're planning on integrating into an application you likely want a few extra features, like keeping track of your original prompt, the revised prompt and also optionally storing the image to disk, since images generated via URLs don't stick around for long.
The wrapper provides a few nice features:
- Strongly typed
ImagePrompt to hold both input parameters and results
- Easy methods to access both the URL or Base64 Result
- Easy access to the result image Url as first image url
- Turn base64 data into raw data or a downloaded file
- Download image to a local file
- A reusable structure that can be used for repeated prompt requests and variations
There are two main classes:
- OpenAiImageGeneration() - Matches the OpenAI API calls supported
- ImagePrompt - Prompt input settings and result data
Using these two classes the code gets a little simpler and you get a strongly typed interface.
Generating Image and return an Image Url
The following returns a result via URL, displays the URL (in a browser) and also downloads the file to a pre-specified image storage folder:
public async Task ImageGenerationToUrlTest()
{
    var generator = new OpenAiImageGeneration(OpenAiApiKey);

    var imagePrompt = new ImagePrompt()
    {
        Prompt = "A bear holding on to a snowy mountain peak, waving a beer glass in the air. Poster style, with a black background in goldenrod line art",
        ImageSize = "1024x1024",
        ImageQuality = "standard",
        ImageStyle = "vivid"
    };

    // Generate and set properties on `imagePrompt` instance
    Assert.IsTrue(await generator.Generate(imagePrompt), generator.ErrorMessage);

    // prompt returns an array of images, but for Dall-e-3 it's always one
    // so FirstImage returns the first image and FirstImageUrl returns the url.
    var imageUrl = imagePrompt.FirstImageUrl;
    Console.WriteLine(imageUrl);

    // Display the image as a Url in a browser
    ShellUtils.GoUrl(imageUrl);

    // Typically the AI **fixes up the prompt**
    Console.WriteLine(imagePrompt.RevisedPrompt);

    // You can download the image from the captured URL to a local file
    // Default folder is %temp%\openai-images\images or specify `ImageFolderPath`
    // imagePrompt.ImageFolderPath = "c:\\temp\\openai-images\\";
    Assert.IsTrue(await imagePrompt.DownloadImageToFile(), "Image saving failed: " + generator.ErrorMessage);

    string imageFile = imagePrompt.ImageFilePath;
    Console.WriteLine(imageFile);


}
The key method is:
bool result = await generator.Generate(imagePrompt);
which makes the actual REST API call. This call can take a bit of time, hence the await here. Image generations take between 10-30 seconds depending on complexity of the prompt and also server load (during peak hours response tends to be slower).
Results are returned in the original ImagePrompt passed in.
The actual InputPrompt structure that can be persisted for reuse looks like this:
{
  "Prompt": "A bear holding on to a snowy mountain peak, waving a beer glass in the air. Poster style, with a black background in goldenrod line art",
  "VariationImageFilePath": null,
  "ImageSize": "1024x1024",
  "ImageStyle": "vivid",
  "ImageQuality": "standard",
  "ImageCount": 1,
  "Model": "dall-e-3",
  "ImageUrls": [
    {
      "Url": "https://oaidalleapiprodscus.blob.core.windows.net/private/org-Z96dTfXFjk7DJvYQM7f9Xz6k/user-DYk8NN9m4Z4ZgsAptLbJSh7t/img-U26z3vN9jGCOofaP2PKXFCjN.png?st=2023-12-20T08%3A08%3A10Z&se=2023-12-20T10%3A08%3A10Z&sp=r&sv=2021-08-06&sr=b&rscd=inline&rsct=image/png&skoid=6aaadede-4fb3-4698-a8f6-684d7786b067&sktid=a48cca56-e6da-484e-a814-9c849652bcb3&skt=2023-12-20T01%3A10%3A22Z&ske=2023-12-21T01%3A10%3A22Z&sks=b&skv=2021-08-06&sig=uCWpAInTrvPBbkVdRjb4PBf7IP7v3qvp5rMKRPa93jk%3D",
      "Base64Data": null,
      "RevisedPrompt": "Create an image of a bear perched on the snowy peak of a mountain, waving a beer glass with joy. The scene is captured in poster style, rendered with goldenrod line art against a deep black background."
    }
  ],
  // saved file name if we saved
  "ImageFilename": "_cxh0xd0i.png"
}
But there are a number of additional aggregation helper properties that relate to saved files and status of the prompt like ImageFilePath, HasRevisedPrompt, IsEmpty etc. These are not useful for everybody, but very useful in applications that need to interact with the prompt, or need to save a collection of prompts for display as I do in Markdown Monster. The properties on the prompt also support and are optimized for UI binding (via INotifyPropertyChanged) for the same reason.
Generating an Image into Base64 Data
The example above generated the image to a URL that you can then display in a browser, by navigating the URL either from the application or by clicking on a link (like in the test runner).
But you can also download generated images as base64 data directly and then use that data to either display the image in a browser using a Data url, or by saving the image from the base64 data to disk.
The code for this is almost identical - you simply pass a different flag to the GenerateImage() method:
public async Task ImageGenerationToBase64Test()
{
    var generator = new OpenAiImageGeneration(OpenAiApiKey);

    var imagePrompt = new ImagePrompt()
    {
        Prompt = "A bear holding on to a snowy mountain peak, waving a beer glass in the air. Poster style, with a black background in goldenrod line art",
        ImageSize = "1024x1024",
        ImageQuality = "standard",
        ImageStyle = "vivid"
    };

    // Generate Image with Base64 output format
    bool result = await generator.Generate(imagePrompt, outputFormat: ImageGenerationOutputFormats.Base64);

    // Generate and set properties on `imagePrompt` instance
    Assert.IsTrue(result, generator.ErrorMessage);

    // directly access the image data
    string base64 = imagePrompt.FirstImage.Base64Data;

    // Access the bytes using the helpers on imagePrompt
    byte[] bytes =  imagePrompt.GetBytesFromBase64();
    Assert.IsNotNull(bytes);

    // Save to disk using the helpers
    string filename = await imagePrompt.SaveImageFromBase64();
    Assert.IsTrue(File.Exists(filename));

    // show image in OS viewer
    Console.WriteLine("File generated: " + filename);
    ShellUtils.GoUrl(filename);
}
Other Image Generator Wrapper Methods
There are two additional methods in the library:
GenerateVariation()
Generates an image variation of an existing image. Currently this is not supported for Dall-E 3, and the Dall-E-2 results are basically unusable. This will work better once Dall-E 3 is supported.
ValidateApiKey()
Checks to see whether an API key you have is valid. This is useful in an application that an API key is provided for to not allow accepting an invalid key.
You can check out the full ImageGeneration interface and code on GitHub:

Application Integration Notes
If you plan on integrating this functionality into a UI based application, either on the desktop or on the Web, you'll likely need to build some minimal UI to handle the image creation and probably need to also provide some way to store previously generated images.
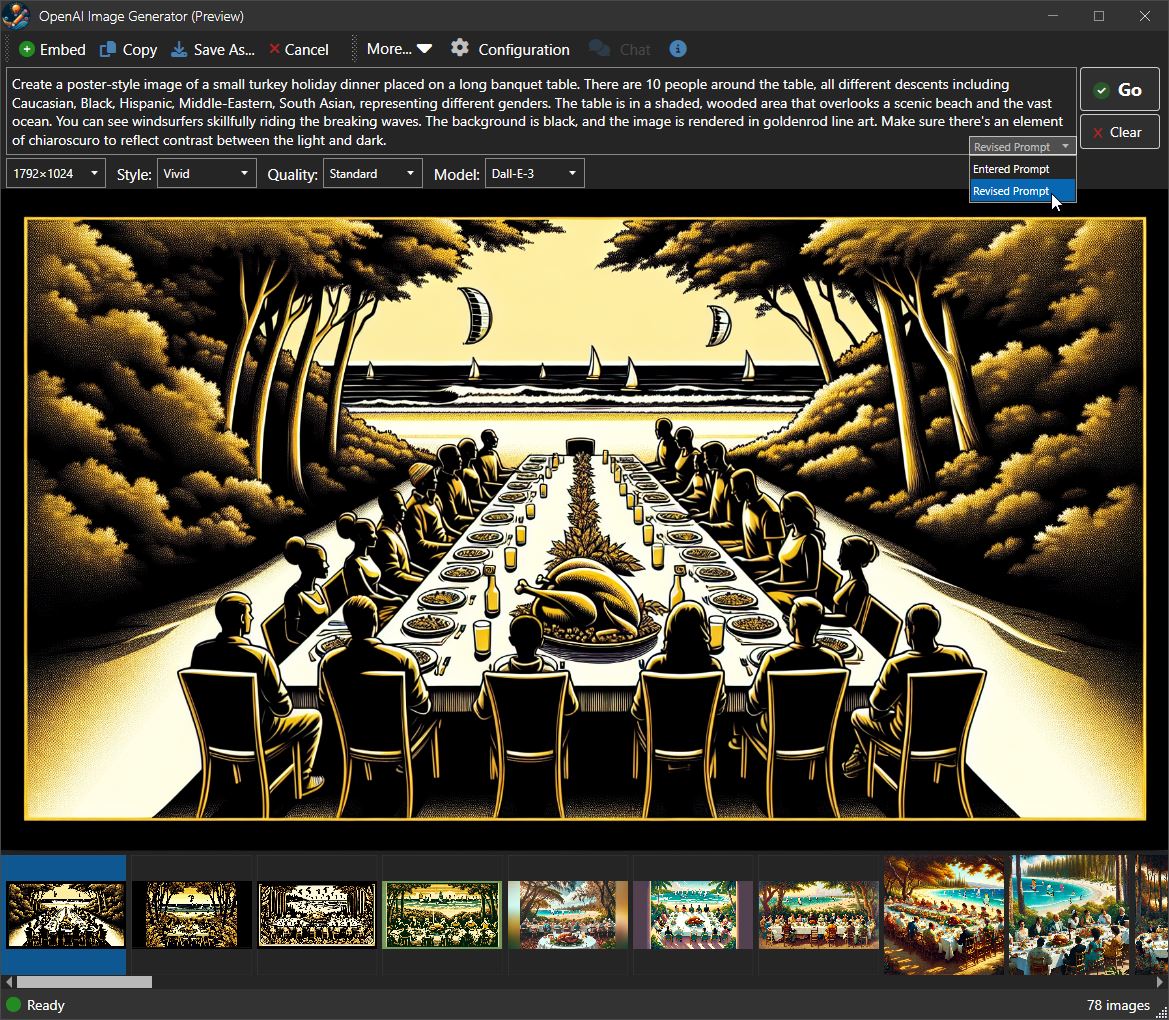 Figure 6 - A different view of the embedded AI Image Generator UI.
In Figure 6 you can see what a typical UI looks like and you can probably imagine how it is bound to the various image prompt and the aggregate helper properties shown above. You have an area to input the prompt and various prompt options, an image preview area, plus an area to display previously generated images. The image list is driven by a collection of saved ImagePrompts which looks similar to the JSON trace I showed above.
It's no accident that most image AI sites, use the same basic UI blocks. Which actually begs an interesting question: Do you need to actually integrate this functionality, or can you simply jump to an existing Image Generation site (Dall-E 3, or Copilot or Bing Image Creator) to perform image generation there and then simple copy images to your clipboard or save them to disk for use in your own applications. While that works and is actually quite functional, it often lacks the tight integration that users often expect. Plus you can offer application specific feature. In Markdown Monster for example images can be directly embedded into Markdown Content, and you can also shell out to open/edit/view the generated image in a number of different ways which offers more flexibility.
I've also noticed that the quality of images generated through the API tend to be better than what the UI sites generate which is interesting given that supposedly they are using the same models. Whther you use OpenAI API, the Dall-E 3 site, Copilot or Image Creator - all of them use the Dall-E 3 model, but the results are not quite of the same quality in many cases.
How to display the Image In-App
If you want to display the image inside of your application, you can use the WebView2 control.
There are a couple of options how to do this:
- Simply display the image from the URL (if current) or from saved local file
- Create a wrapper page
- Embed image as Data link (
src='data:image/png;base64)
- Embed image from file
To display the image in a browser is easy - you can just set the source of the WebView to the full local file url:
<wpf:WebView2 x:Name="WebBrowser" Grid.Row="2" />
private async Task SetImagePrompt(ImagePrompt prompt)
{
    // assign active prompt to display in viewer
    Model.ActiveImagePrompt = prompt;

    // create a **new** input prompt and copy so we can re-query
    Model.InputImagePrompt = new ImagePrompt();
    Model.InputImagePrompt.CopyFrom(prompt, true);

    // set prompt display mode to original prompt on nav
    Model.ShowRevisedPrompt = false;

    // Navigate the WebView
    // NOTE: Has to be manually bound:
    // WebView Uri Source Binding doesn't work (WPF)
    WebBrowser.Source = new Uri(prompt.ImageFilePath);

    //await RenderCompletedPromptInBrowser();
}
This is simple and you're done.
However, if you want to add some additional functionality to the browser behavior - like overriding the context menu like this:
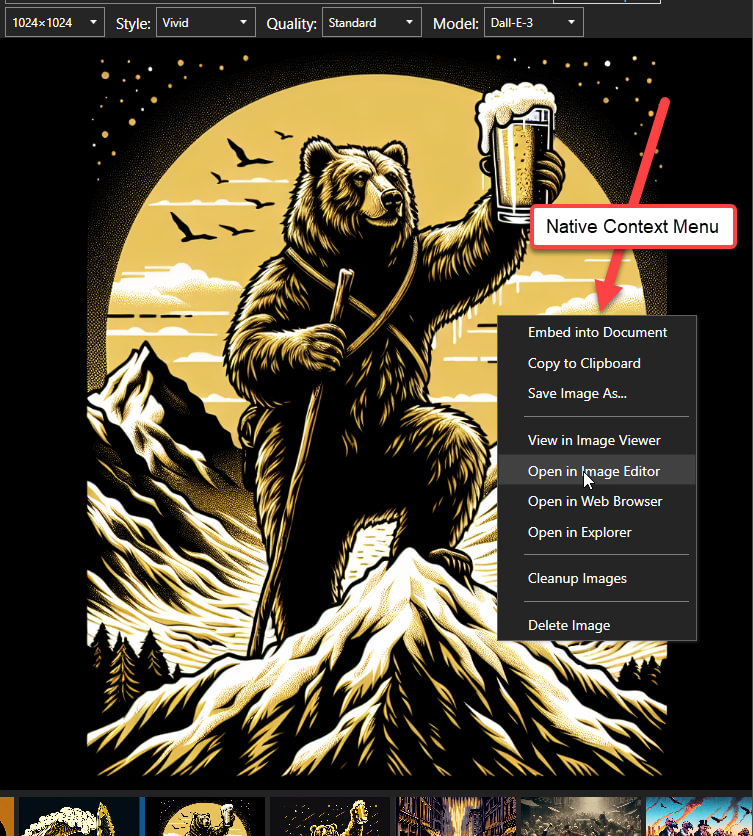
Figure 7 - Displaying the image in the browser via an HTML page and adding page behavior, here to pop up a native context menu.
you need to generate a page that can initiate events like the context menu generation. This gets a bit more involved with the WebView as you'll need to pass messages between the WebView and .NET using JavaScript interop, which I've talked about in previous post.
In this case I'm generating a custom HTML page via code and dump it to a file which looks like this, then render the page from disk:
<html>
<head>
    <style>
        body {
            margin: 0;
            background: #222;
            color: #f0f0f0
            height: 100%;
            width: 100%;
        }
        .image-container {
            width: 100%;
            height: 100%;
            display: flex;
            align-items: center;
            justify-content: center;
        }
        img {
            display: block;
            margin: 0 0 0.5em 0;
            max-width: 100%;
        }
        body::-webkit-scrollbar {
          width: 0.6em;
        }

        body::-webkit-scrollbar-thumb {
          background: #999;
          border-radius: 0.2em;
        }
    </style>
    <!-- Script for custom Context Menu Initiation -->
    <script async>
        document.addEventListener('contextmenu',(event) => {
            event.preventDefault();

            // Call into WebView HostObject (mm)
            var result = window.chrome.webview.hostObjects.mm.OpenContextMenu();
            console.log(result);
        });
    </script>
</head>
<body>
	<div class='image-container'>
		<img src='data:image/png;base64,iVBggg...omitted for brevity...==' />	</div>
</body></html>
To render the page then generates the content in memory, dumps it to a file and points the WebView at it:
private async Task RenderCompletedPromptInBrowser(ImagePrompt prompt = null)
{

    if (prompt == null)
        prompt = Model.ActiveImagePrompt;

    if(prompt == null)
    {
        WebViewHandler.Navigate("about:blank");
        return;
    }


    var sb = new StringBuilder();
    sb.AppendLine(HtmlDocumentHeader);

    if (prompt == null)
        prompt = Model.ActiveImagePrompt;

    if (!string.IsNullOrEmpty(prompt.ImageFileName))
    {
        var b64 = await prompt.GetBase64DataFromImageFile(prompt.ImageFileName);
        if (!string.IsNullOrEmpty(b64))
        {
            sb.AppendLine("\t<div class='image-container'>");
            sb.Append($"\t\t<img src='{b64}' />");
            sb.AppendLine("\t</div>");
        }
    }
    else
    {
        sb.Append($"\t<img src='{prompt.ImageUrls.FirstOrDefault()}' />");
    }

    sb.AppendLine("</body></html>");

    var html = sb.ToString();
    var file = Path.Combine(Path.GetTempPath(), "__mm_openai-image-preview.html");
    File.WriteAllText(file, html);

    var fileUrl = new Uri(file).ToString() + "?" + DataUtils.GenerateUniqueId(8);
    // this works
    WebViewHandler.Navigate(fileUrl);

    // this fails - 2mb limit
    //WebViewHandler.WebBrowser.NavigateToString(html);
}
The main reason for this more complicated approach is if you want to render the image in a different way, or perhaps you want to run multiple generations all at once and display multiple images. Using an HTML page allows you more control over the page, than just a single image.
In my case I render to disk because I want to be able to display the native Context menu. While I can get to that same context menu in different ways, it's most natural to click on the image itself rather than some button, or a preview image in the image list. And because it's not all that nice to show the default context menu that lets you jump to Dev Tools and other non-applying operations off the stock browser menu.
So this is why I actually went through the extra effort of creating the separate HTML and rendering from file. If you simply can do everything in the custom rendered page, you can then simply set the source to the new HTML page and you're done.
If however, you need interactivity like the native Context Menu popup then some additional code is required. Notice the <script> tag in the HTML at the end of the header which uses WebView JavaScript interop to call back into a previously registered .NET object. I use a WebView Handler wrapper for this that makes this relatively easy as part of an initialization routine:
// Initialize the WebView for interactivity
WebViewHandler = new Westwind.WebView.Wpf.WebViewHandler(WebBrowser)
{
     InitialUrl = "about:blank",
     ShowDevTools = false,

     // these two provide callback support into .NET from JS
     HostObject = new OpenAiPreviewBrowserHostObject() { Window = this },
     HostObjectName = "mm"  // JS hostObjects name above
};


// Open the WebView Context Menu at cursor
// used by WebView, Image List and More button
public bool OpenContextMenu()
{
    var ctx = Resources["ImagePromptContextMenu"] as ContextMenu;
    if (ctx is null) return false;

    ctx.IsOpen = true;

    return true;
}

// WebView HostObject receives messages from JS code
public class OpenAiPreviewBrowserHostObject
{
    public OpenAiImageWindow Window { get; set; }

    public Task<bool> OpenContextMenu()
    {
        Window.OpenContextMenu();
        return Task.FromResult(true);  // always return a result!
    }
}
Storing and Displaying Previous Images
If you integrate into your own applications it's very likely you'll want to keep track of the images generated. One nice thing of the abstraction of the ImagePrompt class is that it provides a nice and easy way to serialize previous prompts into a .json file you can store.
In Markdown Monster here's how configuration is stored for example: Each image prompt is added to the RecentImagePrompts:
 "OpenAiApiKey": "xdtGLtIb33/QNOGevAgjXm806H0qJcjS18oHw3YmqCqFZssAANEDZSAmQDfGWK2fdHgcSOPtObo=*~~*",
  "DefaultAiMode": "image",
  "MaxSavedImageCount": 500,
  "DefaultImageSize": "1024x1024",
  "DefaultImageStyle": "vivid",
  "DefaultImageQuality": "standard",
  "RecentImagePrompts": [
    {
      "Prompt": "A baked, small turkey holiday dinner on a long banquet table with 10 people, The table is in a shaded, wooded area, looking out over a beach and the ocean with windsurfers riding breaking waves. Poster style, with a black background in goldenrod line art",
      "ImageSize": "1792x1024",
      "ImageStyle": "vivid",
      "ImageQuality": "standard",
      "ImageCount": 1,
      "Model": "dall-e-3",
      "ImageUrls": [
        {
            Url: "https://oaidalleapiprodscus.blob.core.windows.net/private/org-Z96dTfXFjk7DJvYQM7f9Xz6k/user-DYk8NN9m4Z4ZgsAptLbJSh7t/img-QKtTOfyUphE1mjzOWNU98n3r.png?st=2023-12-20T19%3A22%3A36Z&se=2023-12-20T21%3A22%3A36Z&sp=r&sv=2021-08-06&sr=b&rscd=inline&rsct=image/png&skoid=6aaadede-4fb3-4698-a8f6-684d7786b067&sktid=a48cca56-e6da-484e-a814-9c849652bcb3&skt=2023-12-20T13%3A50%3A15Z&ske=2023-12-21T13%3A50%3A15Z&sks=b&skv=2021-08-06&sig=aedfDhvIq7Fztd/ZHaphpzhLadfZP0987WTZm6kT32E%3D",
            "RevisedPrompt": "Create a poster-style image of a small turkey holiday dinner placed on a long banquet table. There are 10 people around the table, all different descents including Caucasian, Black, Hispanic, Middle-Eastern, South Asian, representing different genders. The table is in a shaded, wooded area that overlooks a scenic beach and the vast ocean. You can see windsurfers skillfully riding the breaking waves. The background is black, and the image is rendered in goldenrod line art. Make sure there's an element of chiaroscuro to reflect contrast between the light and dark."
        }
      ],
      "ImageFileName": "_ttm2ekwa.png"
    },
    {
      "Prompt": "A baked, small turkey holiday dinner on a long banquet table with 10 people, The table is in a shaded, wooded area, looking out over a beach and the ocean with windsurfers riding breaking waves. Poster style, with a black background in goldenrod line art",
      "VariationImageFilePath": null,
      "ImageSize": "1792x1024",
      "ImageStyle": "vivid",
      "ImageQuality": "standard",
      "ImageCount": 1,
      "Model": "dall-e-3",
      "ImageUrls": [
        {
            "Url": "https://oaidalleapiprodscus.blob.core.windows.net/private/org-Z96dTfXFjk7DJvYQM7f9Xz6k/user-DYk8NN9m4Z4ZgsAptLbJSh7t/img-h9Qsj15VJq5f2sKo1nrgzuHn.png?st=2023-12-18T05%3A36%3A39Z&se=2023-12-18T07%3A36%3A39Z&sp=r&sv=2021-08-06&sr=b&rscd=inline&rsct=image/png&skoid=6aaadede-4fb3-4698-a8f6-684d7786b067&sktid=a48cca56-e6da-484e-a814-9c849652bcb3&skt=2023-12-17T18%3A48%3A10Z&ske=2023-12-18T18%3A48%3A10Z&sks=b&skv=2021-08-06&sig=80Axns/HZXV4FTpo7JzuqJwNF8ISDnaGY4fyILr2G/k%3D",
            "RevisedPrompt": "Create an image of a holiday festivity with ten individuals gathered around a long banquet table in a shaded, wooded area overlooking a beach. On the table, there's a small, perfectly baked turkey as the centerpiece of dinner. Beyond the wooded area and the table, the ocean waves break and windsurfers take full advantage of them, adding a dynamic element to the tranquil scene. The image is styled like a poster with a predominant black background, the scene is outlined in goldenrod lines, giving an artistic line art flair."
        }
      ],
      "ImageFileName": "_k7wnbski.png"
    },
    ...
 ]
}
This data then feeds the ImageList that displays the images:
<ListBox ScrollViewer.HorizontalScrollBarVisibility="Auto"
         Grid.Row="3" x:Name="ImageList"
         ItemsSource="{Binding Configuration.RecentImagePrompts}">
    <ListBox.ItemsPanel>
        <ItemsPanelTemplate>
            <WrapPanel IsItemsHost="True" />
        </ItemsPanelTemplate>
    </ListBox.ItemsPanel>
    <ListBox.ItemTemplate>
        <DataTemplate>
            <Border BorderThickness="0.2" BorderBrush="#555">
                <Grid MouseUp="StackPanel_MouseUp" Width="120" Height="120"
                      ContextMenu= "{StaticResource ImagePromptContextMenu}">

                    <!-- custom imagePrompt property (app specific) -->
                    <Image Height="120"
                           Source="{Binding FirstImageSource}" />
                </Grid>
            </Border>
        </DataTemplate>
    </ListBox.ItemTemplate>
</ListBox>
The click operation then updates the ActiveImagePrompt that sets the prompt to display in the browser preview, and the InputImagePrompt which is shown in the editor:
private async Task SetImagePrompt(ImagePrompt prompt)
{
    Model.ActiveImagePrompt = prompt;
    Model.InputImagePrompt = new ImagePrompt();
    Model.InputImagePrompt.CopyFrom(prompt, true);

    // prompt display mode - show original prompt on nav
    Model.ShowRevisedPrompt = false;

    await RenderCompletedPromptInBrowser();
}
Re-running Prompts
Note that the model contains both ActiveImagePrompt which is the display model (ie. the selected item in the list) which tracks the active image prompt in the Recent imagePrompt list, and the InputImagePrompt which is the prompt in the editor that's ready to be executed. When initially loaded they contain the same thing, but InputImagePrompt is either a new prompt or a copy of the ActiveImagePrompt.
When I initially created this I only had the ActiveImagePrompt but quickly found that overwriting the original prompt is not a good idea, resulting in prompts and images that are getting out of sync. The InputImagePrompt is always separate so that any Go operation generates a brand new imagePrompt that is separate from the existing captured prompt. You basically never want to overwrite an existing prompt, always create a new one.

Some Thoughts on using Image AIs and Ais in General
I'm usually pretty reserved when it comes to new, super hyped technology and anything AI certainly falls into this category today. But when I originally heard about image creation AI's I was eager to try it out.
I was excited because I have tons of use cases that this can potentially address for me. My image needs are usually not commercial grade and I've in the past tried to hack my own art into projects with mixed results. Image AI fit a perfect niche for those scenarios where I need what I call filler art for things like blog post banners, quick one-time covers for album art for my music, banners for events, or a little image that can serve for an icon of an open source library.
Starting out - Some Image Generators to Try
If you've not tried out any of the image generation tools you probably should go and check out a few of them to see how they differ from each other. Each of the engines generates images differently both in style and quality from the same prompts.
There are a lot of image generators out there now and I've tried a few of them and all of them are interesting:
Bing Image Creator and Copilot
Free and paid. Image Creator also uses Dall-E 3 for image generation, but it's free to start with. Produces 4 images at a time and works great. Probably the best place to start since it's free and produces good results. This functionality is also integrated into Copilot via ChatGpt 4 prompts where you can specify 'Create an image of' which then defers to Image Creator. The downside is that you can't easily iterate images with CoPilot as you constantly have to re-enter the prompt text.
OpenAI Dall-E 3
Paid and uses ChatGPT 4. OpenAI created the original ChatGPT and Dall-E models and you're likely to see the latest and greatest models running on the OpenAI site. ($20/month)
Mid Journey
Paid. MidJourney is an oddball tool in that it has to be operated through a Discord message prompt. The reason for this odd behavior is that MidJourney tries to be an open platform where images are generated in public for all to see and share - you can see what prompts people are using as well as the output generated which can be very useful to learning prompt optimizations as well as tweaking options. MidJourney is often very imaginative with it's prompt results, making it a great choice for more abstract requests. It also does better than Dall-E for drawing style non-photo realistic results - I see a lot mind blowing graphic novel and game dev designs which explains the Discord usage to some extent.($10/month)
Gencraft
Paid and Free. I've only played around a little with GenCraft and it produces decent image output, but I would say it lags in quality behind Dall-E or MidJourney.
Stable Diffusion
Free and Paid and Offline Local Engine option. Stable Diffusion has an online site where you can generate images - very slowly - for free, or you can pay and get faster access to image generation. Image generation tends to be Ok, but not great - many of the images look very rigid and don't blend together. One interesting point is that Stable Diffusion is open source so you can install and run it on a local machine. It's a big install that requires Python, so it's not easy to package and ship with an application, but it's doable if you just want free local image generation that nobody can snoop in on.
Personally I regularly use:
- OpenAI API, Azure OpenAI (less so)
- MidJourney
- Bing Image Generator (because it's free)
- Copilot (because it's free)
Out of these I've gotten the most used results from my own OpenAI API integration, mainly because I can tweak the settings exactly and I can easily go through my prompts and re-run with minor tweaks.
Taking advantage of original and revised prompts is what makes the difference here I think. Although it uses Dall-E 3 like Bing IC and Copilot the API seems to produces better results, but that could just be the luck of the draw. I also found that the security limits are dialed down a bit in the API vs the Microsoft offerings so I can get more subversive and slightly more violent prompts through than the public AIs (any mention of 'blood' seems to trigger the public AIs).
That said while I'm fleshing out ideas for images I often use Bing Image Creator first, then pop it into my API integration where I usually end up with the final result.
I really like MidJourney as a counter point to Dall-E because it usually produces very different output. I often use it when I'm playing with new ideas and variations. I also love the fact that you can see what other people are doing - reviewing other people's prompts and seeing the generated output has been really informative and inspirational.
The OpenAI API and MidJourney are not free so expect to put a little money into this as you experiment and use these tools, but if you actually use any images, the cost is well worth it.
MidJourney's basic plan is $10 a month and that's roughly 200 image generations (4 at a time ie 800 images) and you can top off if you run out. I've used it quite a bit experimenting and have not hit the limit.
OpenAI API usage has been more expensive - you can create an account and do $10 increments for fixed price per use usage ($0.04/image). I've gone overboard in the last month as I've worked on the Markdown Monster integration, but even so ended up racking up barely over $20 in the course of a month. Given that I ended up with at least 20 images that I actually used for something (album art, blog post banners, a couple of library logos, a couple of event banners etc.) that's money well spent in my book. OpenAI's pricing is per use, so it's easy to top off the account to a certain amount and not worry about since there's no recurring auto-payment which makes it a better deal than a subscription you may use infrequently.
Rapidly Improving Technology!
Keep in mind that this field is rapidly changing. Recently Dall-E went from v2 to v3, and even while I've been writing this post off and on over the last week, MidJourney went from v5 to v6. These API jumps improve quality and make them insanely better than previous versions. Any of the tools mentioned here invariably will get better and produce more detail and less imperfections as models are improved over time so keep an eye on them. There's nothing static in this space.
Image AI - Blessing and a Curse
Image AIs are image generators that let you generate images from text which is immensely powerful, especially for non-artistic types that want to generate images for whom this technology is an incredible enabler. But make no mistake this technology is also being heavily used by traditional professional artists who are often much more adept at eliciting truly stunning results out of the technology, and use it either as is or as a starting point for further improvement.
The technology is transformative in that it will introduce a whole new generation of users to create 'art' or images. Undoubtedly the result will be a lot of trashy and ridiculously silly image content. But it's also likely to improve visual content for many aspects that aren't traditionally thought of as targets for images. And we're hopefully done with inappropriately bad hand designed logos and banner art 😂 (and yes I'm guilty of that myself!)
There will be good and bad things about this image generation technology, but I'm certain it'll be here to stay. Even if you don't feel all warm and fuzzy about it, it behooves you to understand and at least play around with it to see what it can - and can't - do.
That said, AI image generation is very different than traditional art generation where you had to either sit down and do the work or give instructions to someone to do it for you.
You still do that in a way, but it works differently in that AI doesn't take the directions and is much less optimized to make small changes than a real life artist - or even would-be artist - would.
Randomized
AI Images with these image generators are created randomly - it's not possible to create the same image twice exactly, even if you use the same exact prompt. In my experience I've found widely diverging image output from the same prompt text, which at first blush seems strange and very counter intuitive, but that's just how these AI generators work. This can work out to your advantage with oddball ideas that you never thought of but are ingenious. Or it can also be incredibly frustrating if you are expecting a very specific result and that never shows up.
Some of the AI engines (MidJourney in particular) support variations of an original picture which allow you to pass in an existing or previously generated image to base additional images on. But even these tend to be quite different from the original even though they may match the overall theme and mood.
Open Mind Required!
What this means is that you need to have an open mind with AI images. Unlike a live artist an AI will do as the AI does, and you're never going to get EXACTLY what you're asking for - at least not with the current state of the art. You can get into the ballpark with a detailed prompt, but even then it often takes many, many iterations to end up with something that you can use. And frustratingly sometimes you get something truly awesome, only to have one tiny little thing be wrong and there's usually no way to fix it short of manually fixing in an Image Editor.
The bottom line is that with AI Image generation you have to leave room for this variability. Sometimes that variability can surprise with new imaginative ideas that may be superior to your original idea. Unfortunately you can also end up going the other way where you never end up with something that works for your usage scenario.
Details, Details
When creating prompts it helps to provide as much detail about images as possible without being redundant or confusing. Sometimes that's easier said than done, as too much detail can cause AI generation to misinterpret your intent. If you provide a detailed prompt and it goes off the rails I found it really useful to look at the revised prompt and then work off that for modifying and running a image generation.
You can get a feel of what that looks like if you try out MidJourney - MidJourney's lower level plans are all public where any images you generate along with prompts are published in the Discord stream. It's very illuminating to look at the various categories and follow along as people generate art. You can see the thought process and tweaks on prompts in real time and I've gotten a lot of inspiration and ideas from that. Recommended.
Styles Matter
Output quality can vary greatly based on the style of output you are creating.
When rendering it's useful to specify a specific image style in the prompt: You can use words like hyper realistic, cinematic, poster style, or use in the style of comic book, graphic novel, Hawaiiana, Noir, CyberPunk etc. just to name a few. Most of the AIs also understand camera and lighting settings so you can specify exposure, camera angle, close up, etc. It's very powerful if you know what your doing, but it requires running a lot of generations to get it right.
Often hyper realistic or photographic output can be very life like, while more general requests and abstract styles tend to be more artistically styled and often can be much less professional looking. Adding an explicit style can force images into more specific genres which is another form of being specific in your prompt.
Prompt Engineering: You gotta have a little Patience
You've probably heard of Prompt Engineering as the hot button word, and while I hate popular hyped terms like this, I've come to appreciate what it means in practice: You end up tweaking prompts over and over again in order to end up with a result that is usable. A little tweak here that provides more detail, or a little nudge that removes a word that's superfluous can produce very different results. You can work with the original entered prompt or more often than not, look at the revised AI generated prompt that is much more specific.
And that's where the curse comes in: You can waste a ton of time and burn through image credits trying to tweak prompts to get to something that will work. And you never know exactly what will end up working for your work scenario.
I know I've had very specific ideas of things that I wanted to generate, and ended up with some images that were actually much better suited and often way more imaginative than my original idea. But sometimes you want something specific and you just can't get it.
The bottom line is that in order to get the most out of Image AIs you have to have an open mind to different ideas and visualizations as well as patience to try a lot of different and even the very same things many times.
Is it worth it? To me - absolutely.
I've generated a few images that were just absolutely perfect - and yes way more perfect than what I was envisioning. At other times it's taken close to a 100 tries to get something that worked with nearly identical prompts. And on a few occasions I just couldn't get anything generated that worked at all.
Nothing is perfect I guess and I'm OK with losing a few if most of my attempts work out. I've had about the same success rate with hiring actual artists, too 😜.
Use it or lose it!
As cool as the technology it also scares the shit out of me because of what this means. First off it's obviously highly disruptive technology as this will no doubt have an impact on people working in the graphic arts field. This technology won't replace a good artist or designer but it's certainly going to have an impact on the lower end of the pay scale where some traffic that went to designers gets siphoned off to AI.
As to usage I know quite a few people who want to swear off AI in general, thinking of it as a bad thing to replace human labor. That's not wrong, but the reality is that once technology like this is out of the bag, it's not going back in. You either take advantage of it to its fullest, or you get left behind - sad as that is. This is true for image generation and especially for the various Chat AIs. Even if you are not in favor of these technologies, understanding what they do and how you can use them is important.
Ethical Concerns
The other concern is that these technologies are firmly in the hands of big corporations who control everything about these tools. The inputs, the security parameters, the training protocols, the 'ethical' and political leanings and so on. And with that these big entities control what type of reality you can present through the AI generated content.
This is more pressing with Chat AIs than images as it's much easier to put bias into words than images, but you can even find this in restrictions being placed on images. Subversive content, often even if mildly so (common themes for punk rock songs for example) or mildly violent content often trigger security warnings.
Here are a couple of examples:
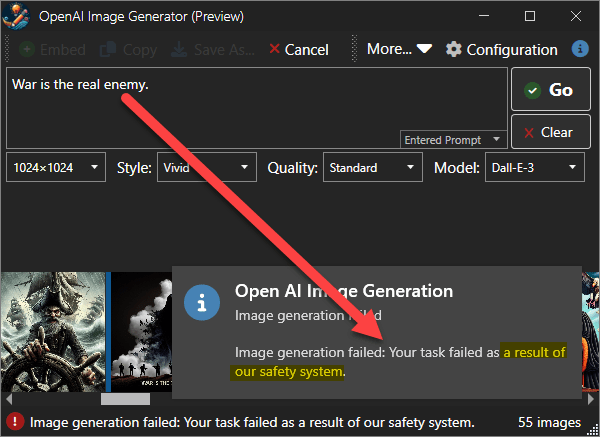
This prompt ironically is specifically anti-violence yet triggers the safety protocol.
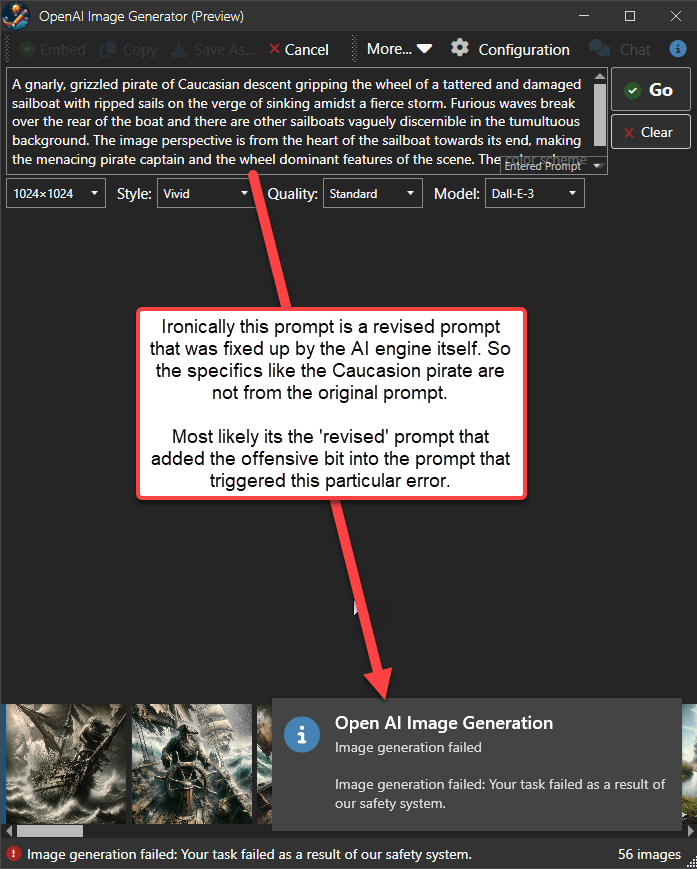
This prompt started out harmless as a pirate on the wheel of a tattered ship, but after several iterations of prompt revision by the AI itself the prompt no longer runs due to safety violations.
Not only that but it also matters on where you run this prompt. The failures are occurring on Azure's Dall-E 3 engine, while the same prompt runs without issue on the OpenAI API.
This demonstrates that the provider is exerting content control here, in addition to the biases that are inherent in the AI model data itself.
Some of this is ironic: Given our ultra-violent movie and media industry which exposes all of these things in just about every movie or TV series published these days, it seems laughable to roll these security features out in the name of 'safety'.
All the while you know that the provider companies themselves and likely also state actors have and can use this same technology without any guard rails to feed propaganda purposes without any restrictions precisely where it can be used to cause serious societal damage.
The dangers are there and it's important to understand what they are, even if we have little control over it as users. At this point we have to live what's out there and that means taking advantage of the tools we've been given. They are tools of productivity and I can't stress enough, that it's not a good idea to dismiss this technology; not for personal misgivings, or due to all the exuberant hype. Know what it is, and how you can use it and take advantage - if you won't, somebody else will!
Summary
Image AIs are still relatively new, but already they are showing enormous potential for providing tools for non-artistic types like myself to produce quite usable images for every day use.
With the ability for easy integration of the OpenAI Dall-E image generation into your own applications with minimal effort. But you need to figure out how you handle payment for AI usage either as part of your apps' pay structure or by having users providing their own API keys which can be a bit awkward for non-technical application users.
To me Image Generation AI's have had a big impact at least in the short term as I've gone through a number of old projects and updated horrible old images with newer and much more appropriate generated images. I suppose as time goes on my everyday image generation needs will go down, but I'm certain there will be a least a few times a month I need something.
Resources
Other Posts you might also like